Friday, February 20, 2009

Back-tracking pt. 1: Cookies


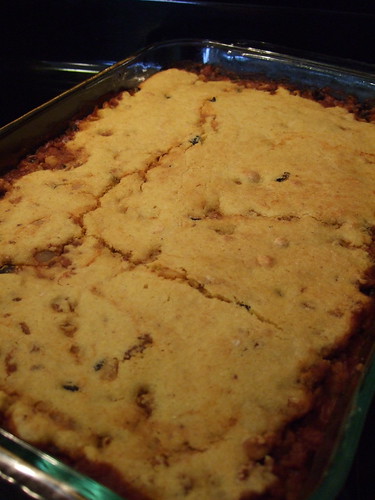
In my blog-laze over the past months, I missed covering Thanksgiving and Christmas. I should be able to produce some kind of massive photo montage of the gastronomic insanity that was Thanksgiving (one word: Turducken), but the only thing I really photo-documented during Christmas was my favorite part: Christmas Cookies. We have been making the same recipe for as long as I can remember, and why would we change it? It is amazing.

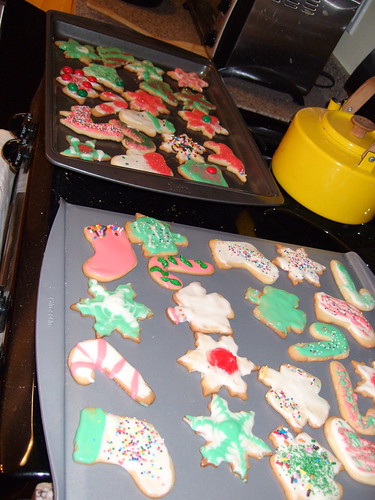
Whenever I start making these I always believe there will never be enough cookies and make a double batch. I roped my sister and the in-laws into decorating a huge quantity of these cookies. I was careful not to thank them for their help until they were finished, because I didn't want the help to stop. So I will say it here and now: Thanks, you guys. Great work. I hope you do it again next year.

This recipe is credited to Mrs. Elmer L. Anderson, wife of former MN Governor, and is found in a 1974 church cookbook from my mom's library.

Roll Out Sugar Cookies That Never Stick

3 cups flour
1 cup butter
1 tsp baking soda
2 tsp cream of tartar (found in the spice aisle)
2 eggs
1 cup sugar
1 tsp vanilla

Mix flour, soda, tartar in food processor. Cut butter into dry ingredients, pulse a few times. Add eggs and sugar and mix together for just a few seconds until a dough ball forms.

Place dough in a bowl and cover snugly with plastic wrap. Refridgerate dough for at least 20 minutes, up to overnight.

When ready, preheat oven to 400 degrees. Roll dough out 1/8" thick on a floured surface. Use your favorite seasonal (or not) cookie cutters. Be sure you have a few cookie sheets available so you can keep working while each pan is baking. Bake for 8-10 minutes per pan, but watch carefully and remove from oven when cookies start to brown. They burn really quickly, which makes everyone sad.


As for frosting, my technique is a little vague. The ingredients are powdered sugar, milk, butter, and cream cheese. I usually start with about 2-3 cups of powdered sugar, toss it in the food processor with a brick of cream cheese, half a stick of butter, and then thin it out with milk as necessary. You want it to be thin enough to spread a thin layer on the cookie, but thick enough that it doesn't fall right off. Plus you need to consider that it should be able to hold your decorations of choice. Then mix a couple of separate bowls with a few drops of food coloring of your choice. Does that help? Should we call it medium frosting?

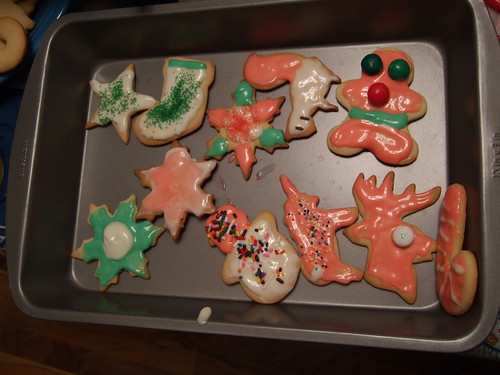
Decorating is clearly my favorite part, my frosting friends can verify that I am a total slave driver in this department. But it is only because I love how creative people get when they are doing this stuff. Laura's MN Nice is my pick for best cookie this year. Congrats, Laura!

Thursday, February 19, 2009

Chicken Soup For Your Mouth


Hey. You know what is really, really good? Chicken soup. And apparently it is good for you too. For your soul. And your hunger. This particular recipe came from the wrapper of one of those 5 pound roaster chickens. I made some modifications based on what I had in the freezer, and added about three times the amount of noodles recommended because they are SO GOOD. I made this once and then made it again a week later because I couldn't stop thinking about it.


2 Tbsp olive oil
1 c. sliced carrots
1 c. chopped onions
1 c. sliced celery
1 chopped red pepper
1 4-5 lb chicken
10 c. water (part or all can be broth, I used about half broth)
1 Tbsp salt
3/4 c (or the whole bag) frozen egg noodles
3/4 c. peas
3/4 c. frozen or canned corn
1/2 tsp thyme (plus other spices--I used rosemary and herbes de provence)

Saute carrots, onions, celery, peppers in oil for about 5 minutes or until tender. Add chicken, water/broth, salt & pepper, and spices. Bring to a boil. Cover and simmer for 1 1/2 hours.


Remove the chicken and skim the fat (I don't really get how to do this yet). Bring to a boil again and add noodles, peas and corn. Boil vigorously for about 10 minutes or until noodles are tender. This may take a little longer if you are using an entire bag of noodles, which I recommend.
Meanwhile, take the meat off the chicken, discard the skin and bones, and shred the meat. Add the chicken back to the soup and enjoy!

This makes quite a lot of soup, so there will be leftovers. Since there is so many noodles, a lot of the liquid gets absorbed while saving. When I reheat this, I rehydrate it with a little extra broth. I like using beef or veggie broth to change the flavor just a little bit. MMMM...soup.

Monday, February 9, 2009

Tamale Pie vs. Tamale Pie


Oh hey! Remember how I have a blog? Sorry, I got a little distracted for a while there. Fear not, I have been making things at my usual break neck speed. Thanks to all of you who kept checking in on the blog despite my laziness. You really would think I would have upped my game when the blog was mentioned in the family Christmas letter.

Anyway, today I thought I would share a side-by-side comparison of two recent hot dishes ('tis the season for hot dish, aka winter)--Tamale Pie times two.

The first comes from Cooking Light Magazine. I made this for the first time a few months ago and Steve declared it one of his favorites out of everything I had ever cooked.


Chicken Tamale Casserole

1 cup preshredded mexican blend cheese, divided
1/2 cup fat free milk
1/4 cup egg substitue (I used 1 egg)
1 tsp ground cumin
1/8 tsp ground red pepper
1 can (14 3/4 oz) cream-style corn
1 (8.5 oz) box corn muffin mix
1 (4 oz) can chopped green chiles, drained
Cooking spray
1 (10-oz) can enchilada sauce
2 cups shredded cooked chicken breast
1/2 cup fat-free sour cream

Preheat oven to 400. Combine 1/4 cup cheese with next 7 ingredients (through green chiles). Stir until just moist. Pour mixture into a 13"x9" pan coated with cooking spray. Bake at 400 for 15 minutes or until set.
Pierce entire surface with a fork; pour enchilada sauce over top. Top with chicken; sprinkle with remaining 3/4 cup cheese (or if you are me, more). Bake at 400 for 15 minutes or until cheese melts. Remove, let sit for 5 minutes. Cut into squares and serve topped with sour cream. Serves 8.

Like I said, this was pretty popular in our house. I kind of think corn bread should be prepared in the way the base of this dish is for regular old corn bread purposes. The only problem I found with it was that it didn't really satiate my hunger for a long period of time. I decided to look for other options with more stuff in them. As always, The Joy of Cooking comes to the rescue.

Corn Bread Tamale Pie


Saute in a large skillet over med-high heat:
1 lb ground beef (I used ground turkey)
1 medium onion, chopped

When meat is browned and the onion translucent, about 10 minutes, add:
1 can black beans, drained and rinsed
1 can drained canned or frozen corn
1 cup tomato sauce
1 cup water or broth
1 Tbsp chili powder
1/2 tsp ground cumin
1 tsp salt
1/4 tsp black pepper

Simmer 15 minutes. Set aside. Preheat oven to 450.
In a medium bowl, whisk together:
3/4 cup corn meal
1 Tbsp flour
1 Tbsp sugar
1.5 tsp baking powder
1/2 tsp salt

In a small bowl, whisk together until well blended:
1 egg, 1/3 cup milk, and 1 Tbsp vegetable oil

Pour the wet ingredients over the dry and whisk until well combined. Spread the meat mixture in a greased 3-quart casserole and cover with the corn bread topping. The topping will (supposedly) disappear into the meat mixture but will rise during baking and form a layer of corn bread. Bake until corn bread is brown, 20-25 minutes.


OK, this one did not work out as well as I had hoped. First of all there seemed to be waaay too much of the meat mixture, and then there wasn't enough of the corn bread to even cover the whole top of the casserole. So I decided to double the corn bread part of the recipe, which made the whole thing pretty dry. So fail on my part, but we ate it anyway. This was a while ago so I can't really remember what we did to remedy the dry corn bread problem, but it seems like just reheating it with a little broth or enchilada sauce would make it all better.

Cooking light wins this round.